A proxy is an intermediary server that sits between a client application (like Bruno) and the destination server that the client is communicating with (like an API). The proxy server acts as a security barrier, making requests on your behalf to websites and other internet resources, and preventing others from accessing your internal network. If your machine sits behind a corporate network or firewall, you may need to configure the proxy settings in Bruno in order for requests to be made.Documentation Index
Fetch the complete documentation index at: https://bruno-a6972042-mintlify-testing-jsonbody-jsonschema-1777266.mintlify.app/llms.txt
Use this file to discover all available pages before exploring further.
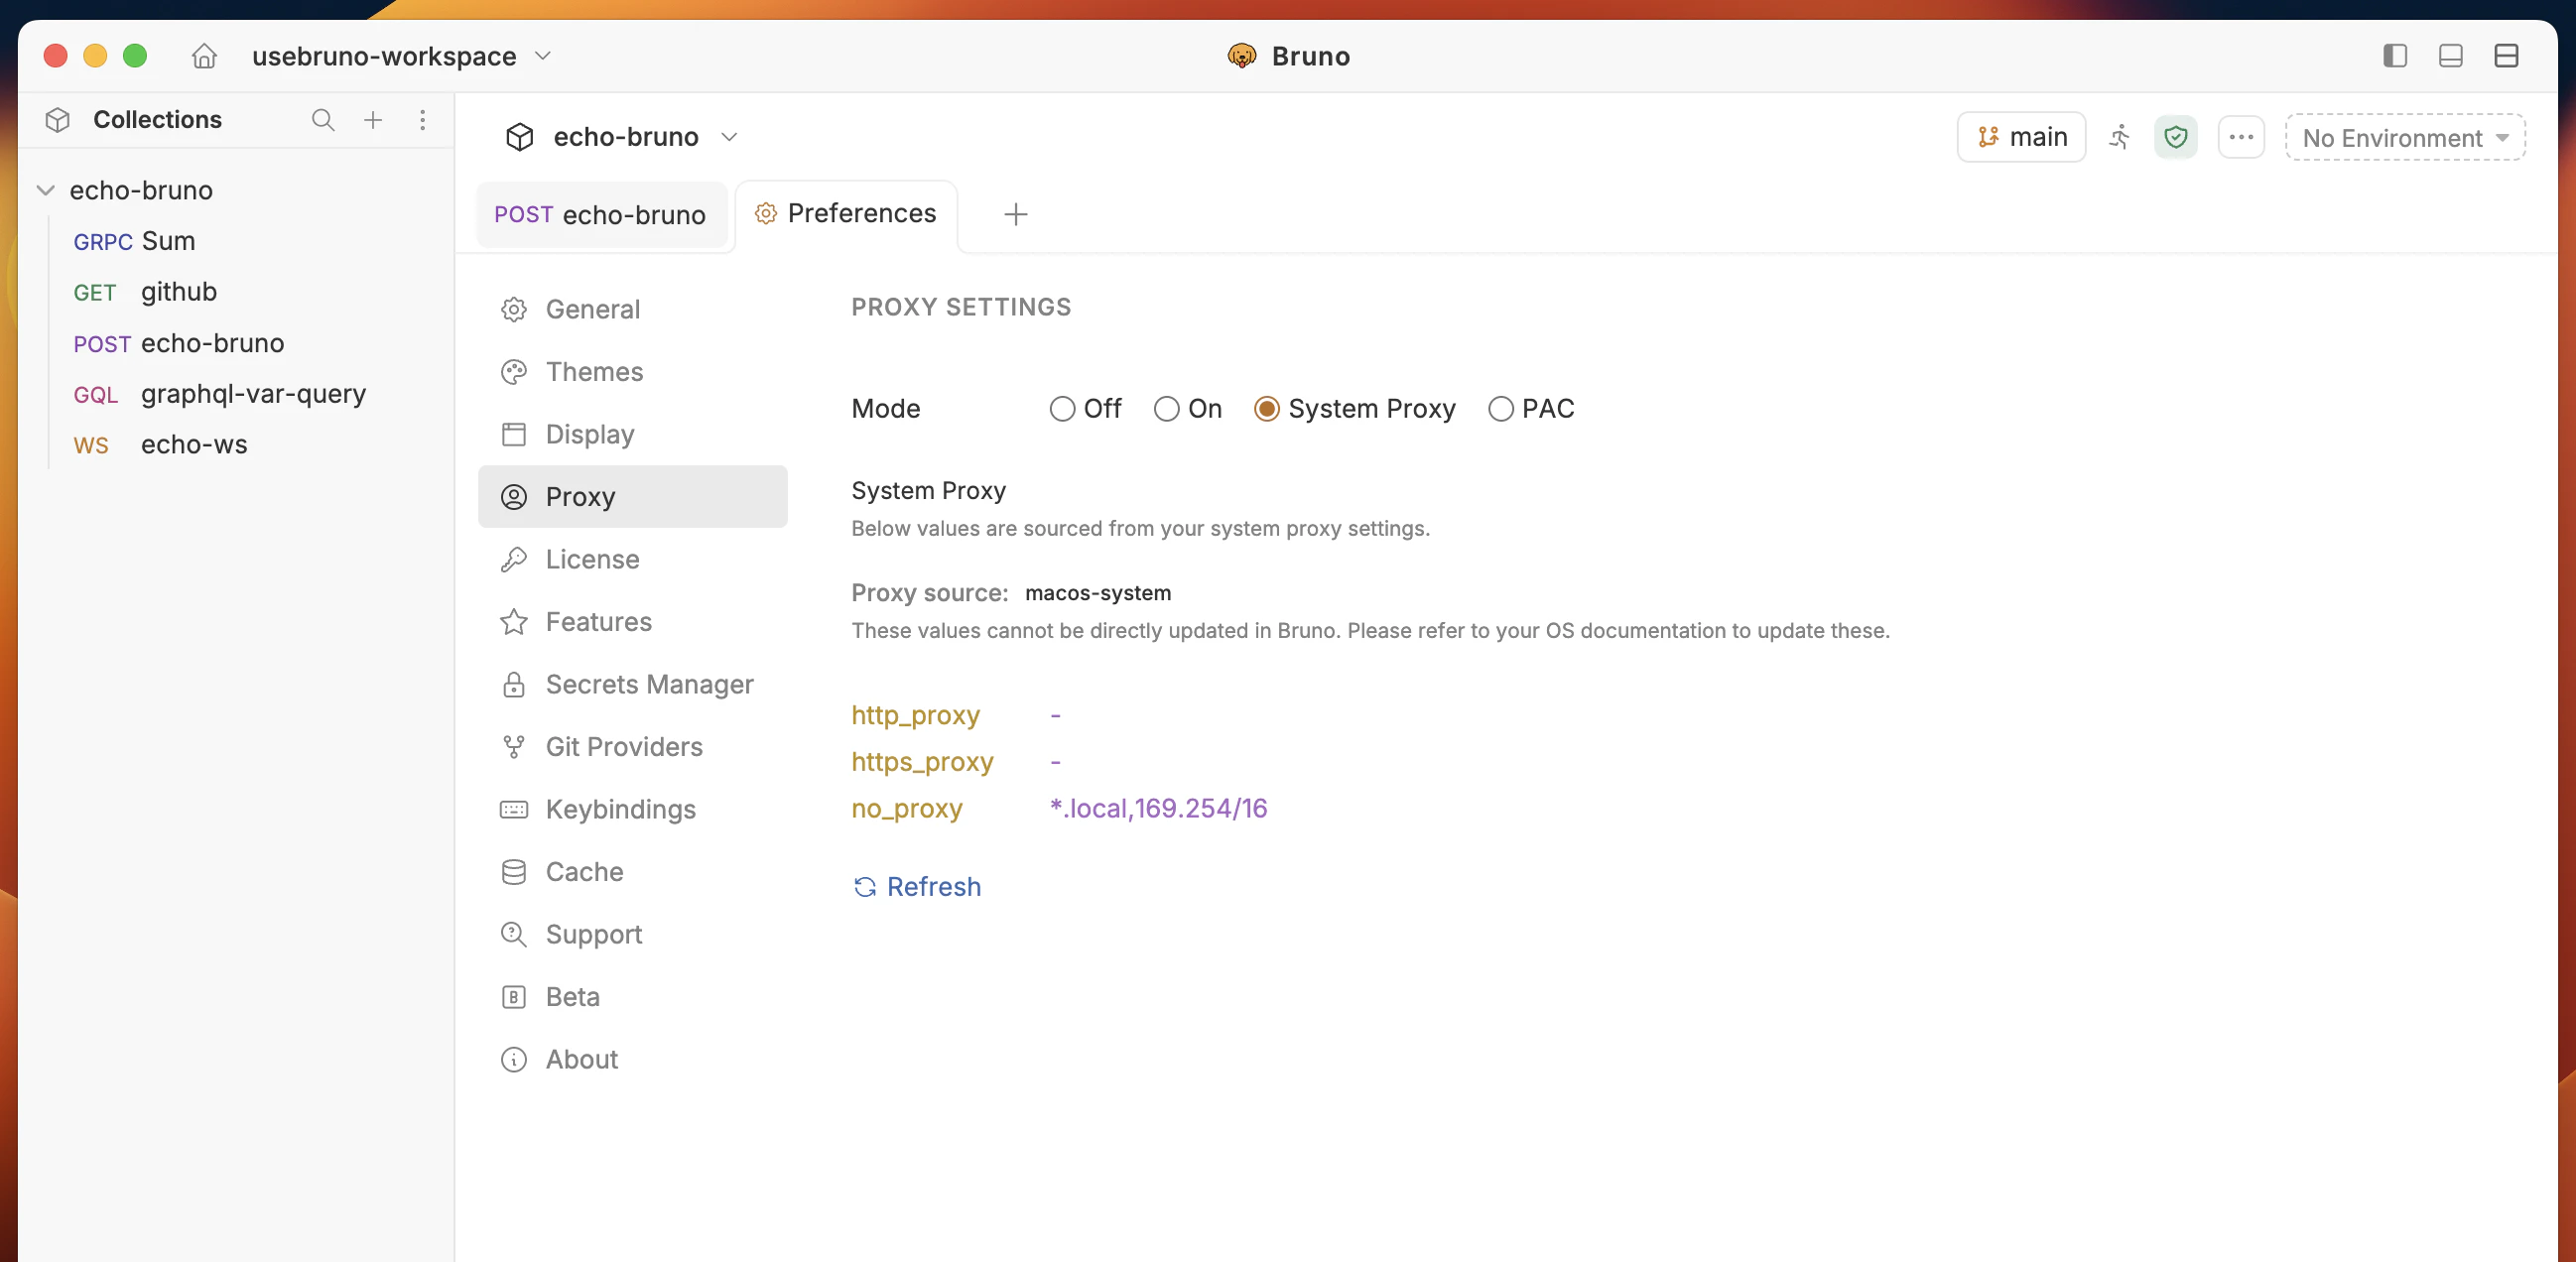
Starting from v3.1.0+, System Proxy is enabled by default for new users and Existing users retain their current preference settings.
1. Accessing Proxy Settings
- Open Bruno.
- Click on the Preferences section from the bottom left corner.
- Navigate to the Proxy tab in the sidebar.
2. Configuring Proxy Mode
Bruno provides four options for proxy mode:- Off: Disables proxy usage.
- On: Enables proxy and routes requests through a manually configured proxy.
- System Proxy: Uses the system-wide proxy settings.
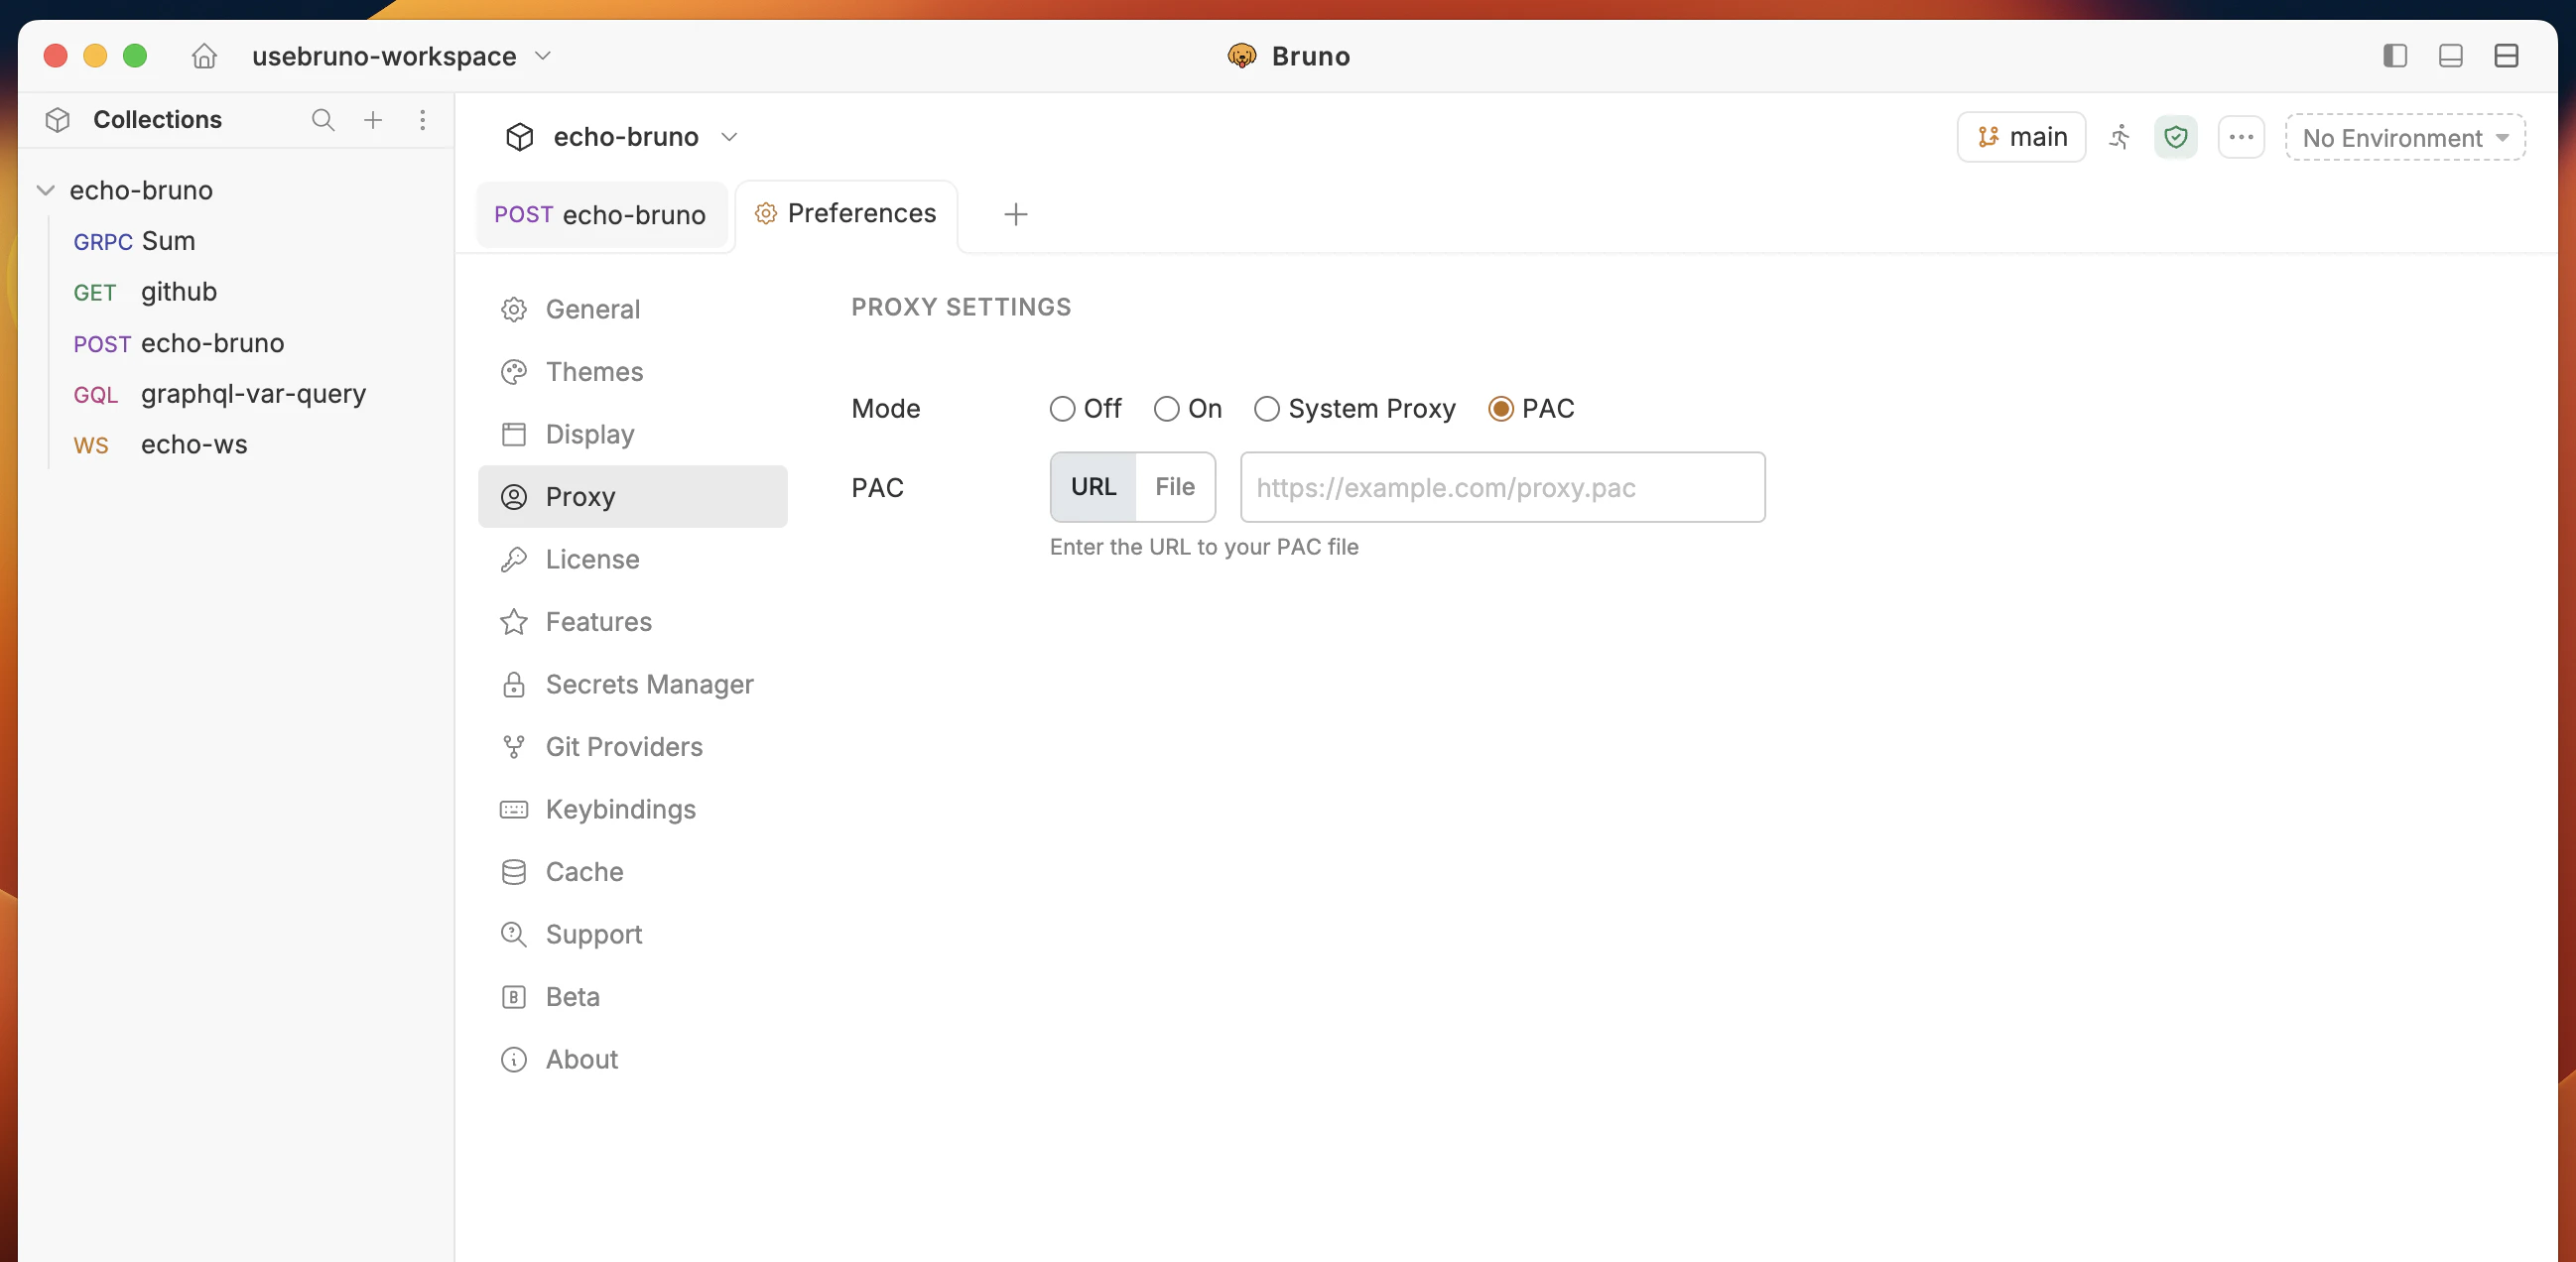
- PAC: Uses a Proxy Auto-Configuration (PAC) file to determine the proxy for each request.
3. Selecting Proxy Protocol
Bruno supports different proxy protocols. Choose one of the following:- HTTP
- HTTPS
- SOCKS4
- SOCKS5
4. Entering Proxy Details
Fill in the required fields:- Hostname: The proxy server’s domain or IP address (e.g.,
example.com). - Port: The port number for the proxy connection (e.g.,
3000).
5. Enabling Authentication (Optional)
If your proxy requires authentication:- Check the Auth checkbox.
- Enter the Username.
- Enter the Password (Click the eye icon to reveal the password if needed).
6. Configuring PAC proxy
When you select the PAC proxy mode, Bruno resolves the appropriate proxy for each request using a PAC file. You can provide the PAC file in two ways:- URL: Enter the URL to your PAC file (e.g.,
https://example.com/proxy.pac). The URL must use thehttp://,https://, orfile://protocol. - File: Click Choose file… to select a
.pacfile from your local filesystem.
FindProxyForURL function in the PAC file for each request and routes traffic through the returned proxy.
7. Configuring Proxy at Collection Level
There may be instances in which your collection needs to use a different proxy than what you have configured globally. Configuring proxy settings at the collection level will override any configuration you’ve made in the preferences section. Below are instructions on proxy settings at the collection level:- Open the collection settings.
- Navigate to the Proxy tab.
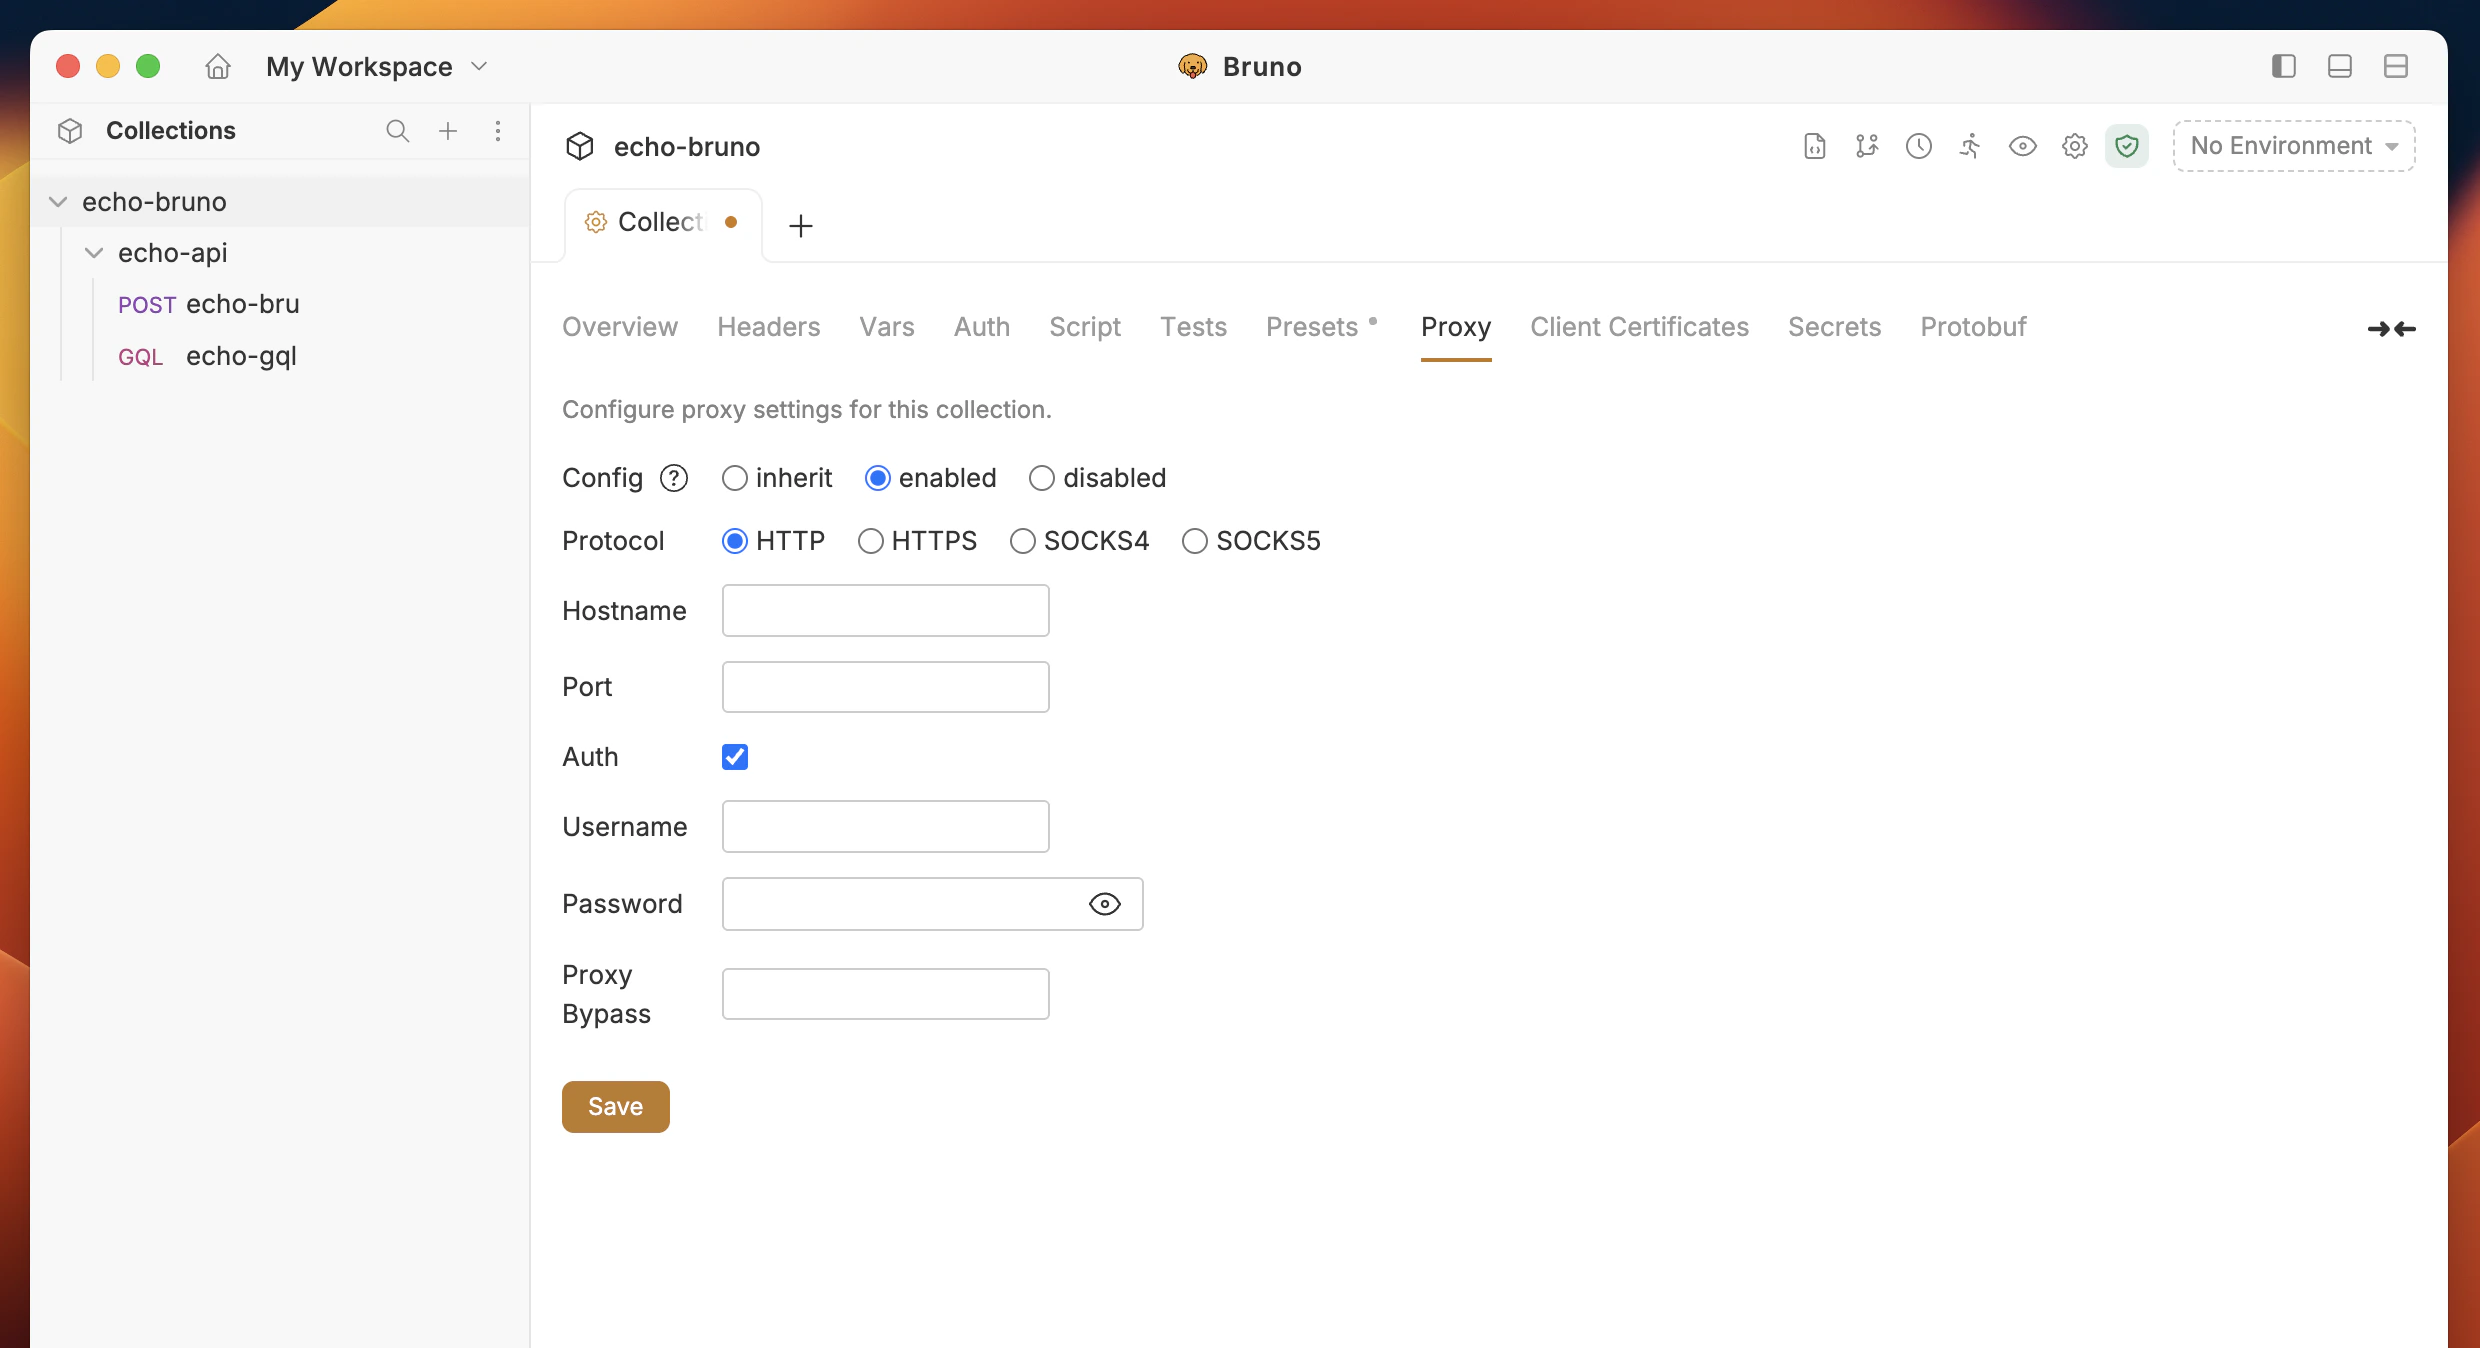
Choose the Configuration Mode:
- inherit: Uses the main proxy settings from Preferences.
- Enabled: Enables a custom proxy for this collection.
- Disabled: Disables the proxy for this collection.
- Choose inherit, enabled, or disabled.
- Enter the Hostname, Port, Protocol, Username, and Password if needed.
- Click Save to apply the settings.